A Few Fantastic Resources for Artists

30 Nov

I thought I’d take a breather from my current illustration project to share with you some wonderful online resources for artists. The internet is a treasure trove for free educational tools and materials, so let’s take a look at some really fantastic links that will get your creative juices flowing. These are some of my personal favorites!

One of the most important tools for digital illustration is the graphics tablet. With Plastic Shards’  Wacom Beginner How-To, you will learn everything you need to know when it comes to choosing, configuring and drawing with your tablet. I recommend reading through this site even if you’ve had a tablet for awhile and you feel you are adept at using it. You might learn something new! I can’t recommend this guide enough.

One of my favorite “secret weapons” is  Posemaniacs.com. I probably would have never known about this site if I did not discover it through a Japanese artist’s webpage. Posemaniacs is a 3D human model that you can use for your drawing reference. Take note that in addition to full bodies, you can also view specific body parts such as hands in many different positions and rotate those models 360 degrees. This is fabulous if you cannot take a life drawing class or can’t afford to buy books from the VirtualPose collection. If that isn’t cool enough on it’s own, there’s also a FREE Posemaniacs App for iPod Touch and iPhone, which is mega cool for drawing on the go.

It is important to realize that when painting digitally, the result of your work is largely reliant on your technique. Your mileage will vary with the tools you use, whether it be Photoshop, Painter, OpenCanvas, Paint Tool SAI or any other number of programs that are popular for digital coloring. That being said, there’s no “right” way to color, and I’d discourage anyone from ever settling on one specific method of painting until they have tried many different kinds and found what works best for them personally. Armed with that information, you can confidently browse through thousands of online painting tutorials, with the knowledge that none of them are a definitive guide. The best place to get started is most likely DeviantArt’s Drawing/Painting/Airbrushing Tutorial section, where you can choose the software you’re using to paint with and start perusing. Doing a search works just as well, if perhaps you’re looking for something more specific like cel shading or blending.

Any Photoshop guru is familiar with custom brushes and the many sites online that can provide you with them for free download. However, you may not be aware of the variety of special brushes that other artists create that are made specifically for painting. These brushes usually try to replicate natural media or make it easier to apply textures or fill in details such as foliage. For Photoshop, you should definitely check out My Brush Pack by adonihs and Essential Illustration Brushes by fox-orian. If you are looking for Painter brushes, try out what-i-do-is-secret’s Brush Pen or Morgalahan’s Painter Brushes. I can guarantee you’ll enjoy using these more than default brushes for drawing and painting.

Hopefully this humble yet powerful collection of invaluable resources will help you in creating fantastic new works of art. Good luck!

How to Change Site Preferences and Bookmark Images on Pixiv (in English)

8 Nov

Notice: Much of this information has been obsolete by Pixiv’s 2010 site re-design. For my more recent tutorial on modifying Pixiv site preferences, go here.

Once again, I’m here to talk to you about using Pixiv. This time it’ll be how to change your site preferences and how to add images to your bookmarks.

Site preferences is an important section because it’s where you need to go if you want to change your email address or your password. This is also where you can enable or disable email notifications, as well enabling adult content viewing and various privacy settings. Make sure you’re logged into Pixiv and let’s get going!

Changing Your  Site Preferences

Pixiv Navigation Bar - Edit Preferences

Step 1. On the site navigation bar, the button on the far right will take you to your “Edit Preferences” page. Make sure you’re at the homepage, because on artists’ pages, the navigation bar is different. The URL to the page you’re headed to is http://www.pixiv.net/edit.php.

Edit Preferences Page

Step 2a. Here’s where you fill in all of the meaty details! The first two columns will show your Pixiv username and your current registered email address. If you want to change your email, type that into the 3rd text field. Take note that if you have autocomplete enabled in your browser, it may insert your username into the “mail address” change field and can mess up the submission process. If that happens, just delete your username from that field before submitting!

Step 2b. Every Pixiv user (including you!) has their own little bulletin board. It’s a bit like a shoutbox or the profile comment page on DeviantArt. You can choose to make it private or only viewable by certain people. If you want to leave it public, leave the setting alone, as it is that way by default.

Step 2c. Browsing Restrictions are, I’m sure, what you’ve been looking for. This is where you choose to enable or disable adult content. There are two types of mature content. One is R-18 (explicit sexual content) and the other is R-18G (explicit guro content.) In case you don’t know, guro stands for “grotesque”, and implies that the image is explicitly violent or gruesome. In the capture I’ve posted, I have R-18 content enabled and R-18G content disabled. By default, both of these options are turned off, so if you don’t want to see any explicit content, you have nothing to worry about and can skip this section. Select the button on the left to enable an option or the button on the right to disable it.

Step 2d. Next is email notifications for messages and rankings. You can turn them off with the right button if you’d like, but if you’re not an active artist on Pixiv, you’re probably never going to receive any notification emails anyway.

Step 2e. The very last section is for blocking specific users from accessing your Pixiv profile/images/bulletin board, etc. It’s essentially “banning” another user from interacting with you or your Pixiv site. Hopefully you won’t ever need to use this, but it is there just in case. In order to add a user to the block list, you have to insert their member number into one of the “ID” fields. Every Pixiv user has a unique member ID# and you can find it at the end of the URL to their profile, or on a small image on the left column of their profile, which is underneath their profile picture.

Step 3. Once you’re all done with that, click the submit button. Now you can get back to browsing ,with the added bonus of seeing the dirty stuff! (But only if you want to!)

Bookmarking Your Favorite Images

Bookmarking an Image

No doubt you’ve already found hundreds of images you love on Pixiv and you’d like to add them to your favorites! Pixiv has a really cool bookmarking system based on using tags, so here is how to use it.

Step 1. Above I have a typical illustration page. Every image on Pixiv has tags displayed right above it. These tags make it easy to search. This picture is tagged “Copyright” (which means it is a fanart) and “Spice and Wolf” (the name of the series the characters in the picture are from). There’s also a row of stars on the top right. You can click on the stars to give the picture a rating if you’d like to. Now, this picture is soooo cute, I want to add it to my bookmarks, so I click the “Bookmark this Illustration” link in the box that sits on the top right of the image.

Step 2 - Bookmarking Details

Step 2. When you choose to bookmark an image, you’ll get a page that allows you to add details about the bookmark. You don’t technically have to do any of this, so if you don’t want to be bothered,  just hit the submit button! Personally, I like to tag my bookmarks to make browsing them easier. You’ll be glad you did it when you have upwards of 500 images bookmarked,  believe me!

Step 2a. You can choose if you want to make this bookmark public, viewable only by certain folks or viewable only by you. It may seem silly now, but when you start bookmarking the dirty pictures, you’ll know why you have the option!

Step 2b. There’s a text field where you can type in tags manually (separated by spaces) or if you choose to select pre-written tags they will show up in that box automatically. The top tag list is only the tags that the artist has given the image. The big list of tags at the bottom shows tags you’ve used in the past and how many time each tag has been used. I opted to use two of my previously used tags, “Horo” and “Cute”. Gosh, I’ve sure bookmarked a lot of Horo images. She’s just so adorable!

Step 3. You can write a comment about the picture here if you want to. The artist will likely be very glad you did!

Step 4. Hit the submit button!

Image Bookmarked - Step 3

Huzzah! Your image is bookmarked now. You have a few extra options now.
There’s a link to view the bookmark details, which will show you all of the people who have bookmarked that image in addition to you. It’ll also show you what tags each person used on the image, and you can un-bookmark the image there as well.

Alternatively, you can return to the artist’s gallery summary (that’s the center link) OR return to the newly bookmarked image’s page (the link on the right).

What’s this about Twitter in the top right? It’s a handy dandy way to Tweet that you just bookmarked this sa-weet illustration on Pixiv! Cool!

Tweeting About Your Bookmark - Step 4

Now look what happens when you click on that Pixiv link! It takes you to Twitter and inserts a Tweet right into the text box for you. Man, that really works up a sweat! It’ll say (in Japanese) “I bookmarked [pixiv] xxxx on Pixiv” (“xxxx”  being the name of the image!) followed by a shortened link straight to the image page. If you want to you can replace it with English; I just leave it as is. Make sure you keep that #pixivtweet hashtag so the Twitter world can see that you’re Tweeting about the great and wonderful Pixiv!

Pixiv Navigation Bar - Bookmark
(Oh yeah, in case you were wondering; you can access your bookmarks anytime from the 3rd link on the navigation bar from your homepage. The URL will be http://www.pixiv.net/bookmark.php.)

That’s all for today! If you have a specific question about the pages I reviewed, please don’t hesitate to ask. I will do my best to answer it for you if I can. My Japanese is not fantastic, but Pixiv really is a very simple site to browse and enjoy. Have fun!

6 Pixiv Users Worth Following

7 Nov

In my first post, I showed you how to sign up for an account at Pixiv. Now that you hopefully have your own Pixiv membership, you are ready to start browsing through some of the most incredible CG artwork you’ll ever see. While you can probably find a lot of good stuff through random clicking, you’ll get more out of the site once you’ve been directed to some of Pixiv’s most esteemed and talented users. This post is meant to introduce you to just a few of my own (and the Pixiv community’s) personal favorite artists who reside there.


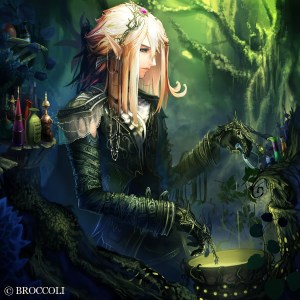
Mushimaro Tachikawa, otherwise known as “Bimo” on Pixiv, is a fantastic artist whose otherworldly digital paintings have been featured in video and trading card games by well known companies such as Broccoli and Taito. He even keeps in touch with the English speaking community via his DeviantArt account.


Capura L is best known for her stunning artwork of Touhou characters. Her breathtakingly magical images often feature a colorful, sweeping sky laden with flowing, luminescent flower petals and particles of glittering light.


Korean artist Dmyo‘s irresistably cute girl illustrations will make your heart ache with warmth. Sweet smiles, soft (yet bright) colors and round, jewel-toned eyes are perhaps what makes her characters so very lovely and inviting.


Nardack, another talented artist from Korea, paints vibrant, dreamy illustrations with romantic Fairy Tale settings that span the Globe. Her illustration series “Fantastic World” features colorful characters who reside in Japan, Korea, The Netherlands, and Italy, to name a few.


Sayori is an extremely well known and beloved Chinese Pixiv artist whose detailed, colorful moe illustrations have earned her a massive fan following throughout Asia. Sayori’s special attention to cute, dainty details give her adorable lolita characters a double dose of sweetness and charm.


While he is not an illustrator of anime-styled characters, Ucchiey‘s epic vistas are a wonder to behold and should not be missed. The superbly detailed architecture, magical lands and exotic creatures which he portrays will literally take your breath away with their magestic beauty and unbelievable intricacy.

While there are literally thousands of talented artists worthy of admiration and praise currently on Pixiv, these are just a few select illustrators whose works of art show great persistence in both their quality and craftsmanship.

Scans and How To Process Them

5 Nov

There’s no denying it. I am obsessed with scans. That is to say, I’m obsessed with collecting other people’s scans, as I haven’t got much of anything in my possession that someone else hasn’t already scanned and posted somewhere in cyberspace. My favorite thing of all to collect is artbooks, so it should come as no surprise that I also collect them in the form of high quality scans. All the kind words in the world wouldn’t be enough for me to thank icie, the people who run moe.imouto and other sites like it for their contributions to the scanning community. I’ll come right forward and admit that I am a firm believer in the theory that scanning something doesn’t make it yours. I think websites like AnimePaper and Minitokyo, which reward people scans on the basis of “in order to have a cookie you must first bake us 24 cookies, which we will probably throw out because your cookies suck and ours are awesome”, are run based on extremely hypocritical motives, as a great deal of the scans submitted to those sites are simply stolen from other scanners who share them freely with everyone. In fact, I’ve submitted my own scans to those sites, only to have them deleted and resubmitted by other users of the same site. In my opinion (and that is all it is – my opinion), the only person who really owns the image being scanned is the original artist… but I digress. I don’t intend for this post to be a rant on scanning ethics.

Everyone has felt the disappointment of downloading an image (especially on a site where you have to pay ‘credit’ to get a ‘high quality’ scan)  in all of it’s high resolution glory only to discover it is plagued by nasty moire . If you had plans to use this image in graphic design, your only hope is to find some way to fix the image without losing detail and quality. Despite being a graphic designer, I found myself sheepishly admitting I had no idea how to get rid of this devilish little pattern. I decided at last to do something about it, and went back to a thread I’ve found myself reading over and over for a long time over on moe.imouto. The time had come to decipher what all of those settings mean! Before I got to that, however, I opted to take the amateur’s approach and do a Google search on removing moire. In order for me to understand the more advanced techniques, I’d have to start with something simple. What I found was this post on About.com. Only five minutes to fix up an image? Right on! I opened up Photoshop CS3 and got crackin’.


I chose this scan of Kaworu as my victim. Rather, this section of a scan. (I figured it’d be easier this way to show you how everything works.) Notice the slight screening on the image? We want to get rid of it without losing too much detail or making it look like a Van Gogh.


Step #1 tells me to go to Filter > Noise > Median and to pick a setting between 1 and 3. The noise isn’t TOO terrible so I decide that “1” looks best. Setting it on “2” or “3” makes the image look over-filtered to my untrained eye. I’m actually pretty impressed how much better the image looks after only one step! I’m excited.


The next step directs me to the Unsharp Mask (Filter > Sharpen > Unsharp Mask) and suggests these settings: Amount 50-100%, Radius 1-3 pixels, Threshold 1-5. I play around with the settings and the only one that I can really see a difference with is Amount.  Ultimately, I go with 60%, 3 pixel radius and a threshold of 5. This brings back of the detail that we lost with that previous noise filter. Neat!

What next?! Oh, that’s it? That was really easy and only took a couple of minutes, and I think the image looks way better! Not perfect, but quite an improvement over the original. Why did I take so long to learn this? Let’s try out something a little more advanced now.

My friends over at moe.imouto are avid users of a free GIMP plugin called Greycstoration. I use Photoshop, but I really want to try Greyc out, so I download the most recent version of the PS plugin that petopeto whipped up. (Thanks, bro!) I open up the original Kaworu image again, go to Filter > Greycstoration > remove noise. I’m introduced to a UI with all kinds of funky settings. I don’t know where to start, so I go back to the what’s your processing thread and start scanning through various posts with recommended settings. I decide to go with one of midzki’s suggestions because midzki is a scan processing maniac. Seriously, this guy’s got mad skills. Many posts suggest doing two separate passes of Greyc with different settings and this one was no exception. Here’s the post I chose to use to try and fix up my image:

midzki said:
btw, I found filtering Greycstoration 2times with completely defferent parameters is really effective.

for example,
1st(-dt 10 -p 0.2 -a 0.6 -alpha 3 -sigma 0 -fast false)
2nd(-dt 30 -p 0.2 -a 1.0 -alpha 0 -sigma 3 -fast false)

1st setting is reducing moire, & 2nd setting is smoothing edges.
The point is setting -alpha and -sigma separately.


Here’s the result of the first pass. Holy cow! That’s different from the original for sure. It’s a lot less sharp than what I expected, but there’s really no loss of detail and it looks good. No moire to be found here, ladies and gents! The alpha setting knocked it right out.


Here’s the 2nd pass. Way smooooth. The sigma setting got rid of any remaining noise or paper texture on the image. Again, it looks really different, but it looks GOOD! Greycstoration is one heck of an awesome plugin!

You’ll notice that the result of my first set of filters versus the results of using Greycstoration are incredibly different. That’s not necessarily a bad thing. I find that in the end it almost turns out to be preferential. Greyc took a lot of the ‘organic’ feeling out by removing any sign of paper texture and making the rough pencil lines extremely smooth. (Granted I didn’t try a variety of settings, either.) Depending on what look you’re going for, you may or may not like it. For this particular image, which I believe Yoshiyuki Sadamoto used traditional media to create, I feel that the grainy paper look complements it, although others may see it as “just noise”. If I was editing, perhaps, a scan of a cel-shaded CG artwork, there’s no doubt in my mind that Greyc would be the only way to go. Ultimately, both methods of processing did their job of removing the moire pattern, so I’m quite satisfied with both. Here’s to learning something new!

p.s. – I’m fairly certain it goes without saying that you’re not going to see any difference in the images in this post without viewing them in full size, but just in case you’re a little slow… ;)

The Dying Art of Cel Collecting

4 Nov

It all started with the Allen Schezar cel above. For $50, I acquired an actual piece of one of my all-time favorite animations, Tenkuu no Escaflowne. Little did I know that it would spawn a collecting addiction that would last for years. The only thing that would stop me, in the end, was the animation industry’s ceasing of using cels to create animation altogether. You could say I was broken-hearted when animation switched over to full CG, but in the long run I was a lot better off. Cel collecting is a habit that really broke the bank, but if I could go back and do it all over again, I would. Nothing quite compared to the high of acquiring an actual piece of your favorite moment of your favorite show while knowing it was one of a kind. I also made a lot of good friends while collecting cels who I still keep in contact with to this day. Lets consider this post my ode to the dying art of collecting animation cels.


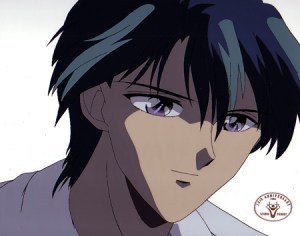
My favorite anime at the time was far and away “Fushigi Yuugi”. It was also the show from which I focused my cel collecting. The same year that I got the Allen Schezar cel, I found this Tamahome cel online and asked my dad to get it for me for Christmas. I eagerly awaited the holiday and when it finally came, Tamahome was mine! I couldn’t have been happier. After that, I began to scour the web for sites that sold cels and also discovered a cel forum where I would eventually come to make a lot of good friends. I built up a very respectable collection of FY cels.


There’s no doubt that the pinnacle of my cel-collecting “career” was aquiring this opening sequence cel of Tamahome and Miaka. For a cel collector, owning part of the most re-used sequence of your favorite show – the opening – is a special thing, indeed.


Many dollars, cels and years later, one of my final purchases was this shot of Nuriko. While far from ideal, it is possibly my personal favorite cel for a variety of reasons. One of them perhaps being that Nuriko was far and away the most popular, rare, and expensive character to collect cels of. The harder it became for me to get ahold of a Nuriko cel, the more I wanted one. At the time, it became an obsession. I ended up landing a few “better” shots of Nuriko, but nothing topped this one for me. Nuriko looked his best by far in this episode, and he is wearing my favorite of his costumes, which I would later sew from scratch for cosplay. This cel has so much sentimental value to me, that if I could, I would purchase a better cel from the sequence if I had the chance, even though I no longer collect cels. Another image from this sequence belongs to my good friend Jody of Mind Eclipse Cels, so check out her gallery.


Fushigi Yuugi certainly was not the only show I collected cels from, but it was the most special to me. Over the years I acquired some stunning pieces of the show and even now I would have a horribly difficult time selling them if I was strapped for cash. The fact that they are one of a kind is perhaps what made collecting cels so incredibly alluring to me and to many others. Over the years I was fortunate enough to get several cels autographed by Watase Yuu and even one by Midorikawa Hikaru, making them even more special and unique.


While I am content no longer being able to collect cels, I certainly don’t regret the time that I did and I still greatly treasure my collection.  I am thankful for the friends I made who shared my hobby (most especially Ryouko, LadyBrick and Trebuchet) and the help they gave me in finding the scenes I loved. As an avid fan of animation, I can honestly say that it was an incredibly exciting and fulfilling hobby, and I will always look back upon it with happiness in my heart. While it is unfortunate that cels are no longer used in creating animation, it only makes the ones that still exist that much more extraordinary.

How to Sign Up for Pixiv (in English!)

3 Nov

Edit: Please be aware that Pixiv sign-up and browsing are now available in English. This post is still here for archival purposes. Cheers! ~ Riven

I thought I’d start out this blog with a bang by making a post others would find useful. Now, please be aware that I made this guide a number of months back, so it may no longer be 100% accurate.

This is a guide for English speakers to sign up for the Japanese art website Pixiv. It’s a bit like DeviantArt or the PortalGraphics community. The thing with Pixiv is that in order to view images at full size, post your own artwork or view “adult” content, you need to have a Pixiv account. Since there is no English version of Pixiv, some folks are at a loss when it comes to signing up. Have no fear! It is a fairly simple sign-up process and I’ve got it all explained here with pictures so that you can’t go wrong (hopefully).


Step 1. Click on that big orange box that says “SIGN UP FOR PIXIV” on it. Easy, right? You’re off to a great start.


Step 2. Insert your email address into that big ‘ole box there, and hit that shiny yellow button to submit it.


Step 3. Your email address pops up. Click the button on the left if you need to make a correction, or the button on the right if everything’s A-Okay!


Step 4. Your email address has been submitted now. Time to go check your email!


Step 5. The email you receive from Pixiv will look like this. You need to click on the custom link inside of the email in order to activate your Pixiv account.


Step 6. You’ll get a page of stuff to fill out. I’ve translated the categories on the image for you. Once you get down to “sex”, you can start to choose from drop down menus whether or not you want the information to be “Public”, “My Pick” (Which makes it public to friends!), or “Private”. I picked the very last option in the drop-down lists for location (foreign/overseas) and the same for job (other).


Step 6. (continued) The last part is text entry box for you to write your introduction or biography in. I’ve simply entered “Hajimemashite!” or “Nice to meet you!” into this box. Once you’re done, click the final button to submit. Congrats, you’re now a part of Pixiv! :)

I hope that this post proves useful to some folks who have been wanting to join Pixiv and didn’t know how. In the future I’ll can show you how to edit your account settings so that you can view R-18 (adult) images and also how to submit your own artwork to the site, if you feel so inclined. Have fun browsing the coolest art site on the planet!

p.s. – You can view my personal Pixiv account here. Feel free to add me to your watch list or check out my favorite pictures and artists!

Welcome to the blog.

3 Nov

It has long been a goal of mine to create a blog exclusively for the purpose of sharing my hobbies and interests with others on the web. In the past, I’ve attempted this and failed miserably. There’s no doubt that I love blogging, although I’m sure the quality of my writing leaves much to be desired. More importantly, however, is my love of talking about the things I enjoy, so perhaps without further ado I can introduce you to yet another of my many attempts to create an interesting public blog.

I chose the name “Plastic Pleasures” because a great deal of the things I enjoy are ultimately made of plastic. While plastic is indeed a useful material, it is often associated with things that are superficial or inane. Am I saying that my hobbies are superficial? Perhaps they are. Perhaps they are not. The most valuable things in the world certainly are not made of plastic, but those made with it ARE an awful lot of fun, and that is what this blog is going to be about.

Like any decent human being, I enjoy reading, movies, music and their many incarnations thereof. More specifically, I’m an avid fan of anime and manga, Japanese culture, video games and animation in general. I’m also an artist in addition to being a lover and collector of art. I consider all of these things my hobbies and things I definitely see myself discussing here in this blog.

I hope things turn out to be interesting.